Search This Blog

Thursday, April 11, 2024

Early Women of Books bag


I have been down a fairly large rabbit hole with this project. 

It began when I read The Gilded Page by Mary Wellesley, an extraordinary book for anyone interested in Medieval History, telling stories about the making of books before the printing press, of those who laboured in the industry, and those who commissioned works. Amongst these are stories of at least nine significant women, largely overlooked in their times. 

Of course, my first thought was that I could make a bag, featuring the names of the nine women, along the lines of the Voices of Women bag I made in January. When I mentioned  this to a friend from my 1965 undergraduate Early English Literature and Language Course, who was also reading the book, she wanted a bag too. I began to wonder if it would be possible to photograph the finished bag and somehow print the photograph on to fabric. While I thought about that I got on with the embroidery

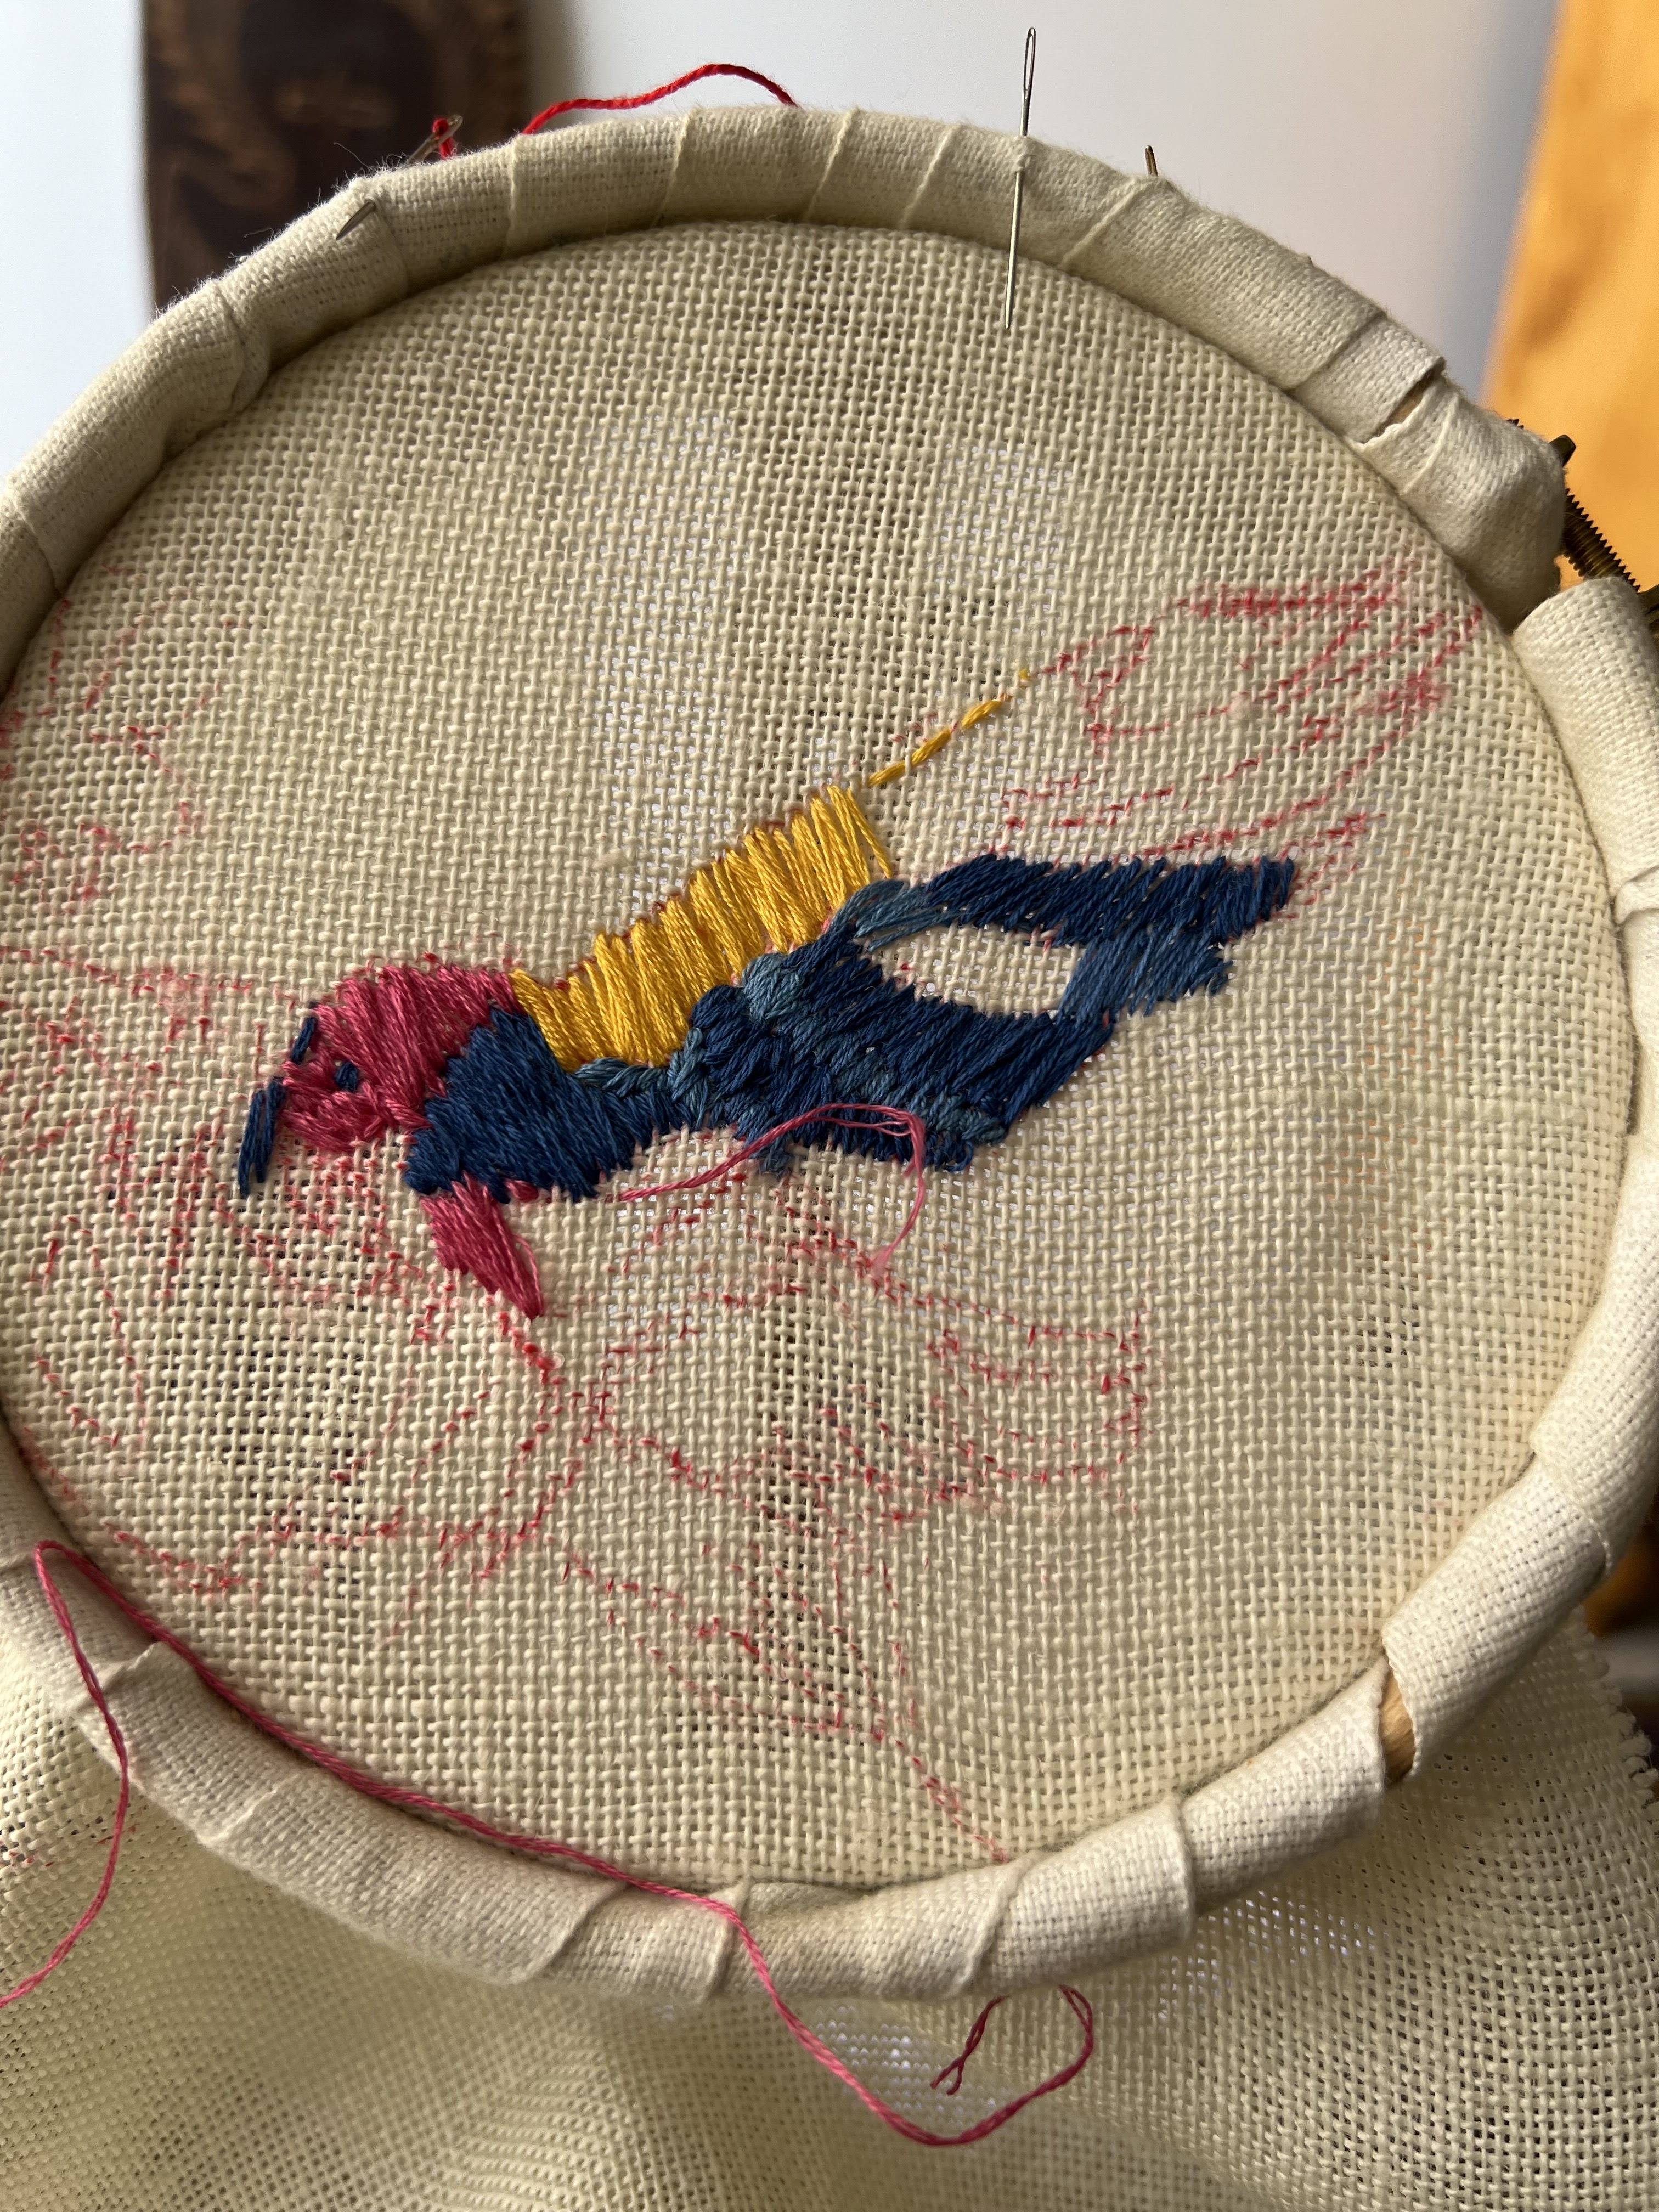
I began by cutting two bag sides from the remaining fabric, and fusing some webbing to the back of each. I drew the nine names in pencil on the sides where they would fit, then mounted one piece in a hoop. I used Quaker stitch to embroider the first name. Leoba was an 8th Century English nun who sent, in a letter to St Boniface, a poem she had written. Boniface was related to her, and she later joined him as a missionary in Germany, ending up as Abbess at Tauberbischofsheim. Her letter to Boniface makes her the first named female  English poet. She had learned to write poetry from Eadburga, a skilled scribe and Abbess at the Thanet monastery, which supported a scriptorium.  

I used red perle 8 thread, and worked the names, dates and occupation of each woman. The dates are mostly estimations of the years they lived, but in Leoba's case, the date of her letter to Boniface. I used a darker red to embroider the one book title included, Encomium Emmae Reginae (In Praise of Queen Emma). This was a book commissioned by Queen Emma, to tell her story and secure the future of her dynasty. Emma's story is also extraordinary

It took me a couple of days to embroider each side and another to make up the bag, lining it in black linen.

I had worked out, as I embroidered, that I would need to do something to tell the story of these women. The original bag used names of, and quotations from, women well known to most of us, whereas these women were largely unknown to even those with a background in Medieval History.

I therefore began to create summaries of the nine lives, using The Gilded Page as a base, but adding and checking with other books and Internet sources. I put these together with photos of the embroidered faces and published a booklet entitled Early Women of Books on Blurb. It can be purchased as print-on-demand or in pdf form. I have no royalty on it, so the price is that placed by the printer. The whole book can be previewed free on the site, but it does take a long time to load in full. 

I have also been experimenting with the notion of a printed bag. I used photographs of the earlier bag to test out sites that offered printing on to tote bags. At first, the only site I found that would print both sides of a bag would only print to a section of the bag.    That was OK, but not quite what I wanted.   

After a lot of searching, I found a more customisable option and tried again. It was ordered from Melbourne, took about 3 weeks, was printed in China - and was what I was looking for. The background colour is more mauve than appears in the photo. The bag is quite large.

I have now ordered a small number of Early Women in Books bags to be printed. I will report back when they arrive - estimated to be at the end of April. When they arrive I will have the original embroidered bag, a booklet about the women, and four printed bags. It's been a very deep rabbit hole for the past couple of weeks. I've learnt a lot. 

The Guild is having an exhibition in August as part of SALA (South Australian Living Arts) with a theme of Divergent Textiles. It occurred to me today that these bags might be my entry! I think they qualify as divergent - crazy might be a more accurate term.

Saturday, March 30, 2024

More Glazig Workshop preparation

Over the Easter weekend I have made an effort to work the two samples I need for the Workshop I have to give later this month. I was hopeful this is the last of my preparation, following the printing of notes and linens earlier this month

The samples are about 2" square. While they are not overly ambitious, they each require 5 or so different stitches and the use of Au Ver a Soie Perlee thread - quite a bit to get used to.

I worked in a seated hoop stand. I needed both hands to maintain tension, as well as protecting my wrist.

I used the smallest piece of linen I had printed for the first one - figuring better for me to use than a student. I stitched it to a piece of old sheet to fit it into the hoop.

It was relatively straightforward until I came to the open chain border, which was very awkward to manage in the hoop, so I ended up taking it out and working it in hand. 

The green section is a feather stitch, the beige ones and the pink flower are buttonhole stitch (one close together, one further apart). The red flower and the yellow centre are eyelets, the purple corner is woven and there are three varieties of chain stitch.

It's a bit rough. I needed magnification. The silk is lovely to work with and largely holds its twist. 


The second sample was in most ways simpler. The leaves and dark berries are buttonhole stitch and the red flowers eyelets. There are three versions of chain stitch. 

The photo here shows my waste knots and the simple chain stitch border before embellishment.

The embellishment proved  a bit tricky. The stitch chart lists it as chainette surjetee. The diagram suggests a series of loops under each chain stitch without anchorage. Searches in Jacqueline Enthoven's The Stitches of Creative Embroidery produced no likely stitch. In the end, I came up with a version which gives the side loops indicated in chainette surjetee and is held in place by weaving under and over each individual chain.

It will be interesting to see what the Certificate Course students come up with.


I'm a bit concerned I may not have provided enough thread of any one colour for students, especially for the daisy flower in the first sample above. I intend, however, to give them the option of cutting another length from the spare reels I have. The colour choice isn't great, but this is expensive thread, and we are, after all, learning about it.

I did enjoy this second sample, perhaps because of the colours I was using. perhaps because the border, however puzzling, was neater and easier than the open chain of the first. 

I'm no expert in this area, and I'm looking forward to learning more from the workshop as we figure it out together.


Monday, March 11, 2024

Cockatoo Bag

I recently bought a kit for a Cockatoo Tote Bag from The Fox Collection. When I finished the Bee Cushion I thought I'd go straight on with the Cockatoo Bag and, as usual, rushed right in. Unfortunately, I made quite a big mistake. I mistook needle-felting for punch-needle, dug out the wrong tools and began needle-felting the cockatoo.  

The cockatoo outline is printed on the inside of the bag, while the flowers are printed on the outside. Both needle-felting and punch-needle are worked from the underside.

It was not until I had the head and shoulders felted that I realised what I had done, by which time it was too late to go back, and too difficult to undo. 

I could embroider over the felted mess on the right side, but could not disguise the contrast between the felted background on the upper body and the lower section without felting. The only way I could see forward was to continue to put a layer of needle-felting on the whole cockatoo, then embroider over it.

The felted result looked more like a crested alpaca than a cockatoo.


Eventually, however, I had something resembling a cockatoo, using a mixture of feather stitch, straight stitch and open chain.

Fortunately, and somewhat surprisingly, the flowers proved to be both more straightforward and more pleasurable. They were primarily worked in satin and long and short stitch. The stranded cotton provided was smooth with a good sheen, very easy to work with.  


The colour combinations differed in each of the three flowers. I was nervous about the length of the straight stitches in the outer flower borders and early on I added some couching.

As I progressed I got a bit more trusting, and did less couching - a decision I now regret. Some of the white guide lines are visible under the edge of the flower on which the cockatoo is standing. They didn't wash out completely before blocking.    

The thread provided was not only good quality, but generous in amount. I have easily enough left to make the whole thing again, probably twice over.                                                              
Although I was pleased with the result when it came off the hoop, I rinsed it gently and blocked it, hoping the print lines would dissolve. It didn't disappear, but it did fade. 

With an outside temperature of 38C, and 26C inside, it took 12 hours to dry.

Although there were no construction instructions, I decided if the bag was to be used, it needed lining. The back of the embroidery was likely to be caught or rubbed on any contents and needed protecting.

I selected a wavy navy cotton stripe, cutting it to the exact size of the bag. 


The fabric was large enough for me to create a gusset along the sides and the base, keeping the face of the bag the size illustrated on the kit package while maximising the internal size.


I'm delighted with the result and have added it to my slowly growing pile of gift  totes.

Tuesday, March 5, 2024

April Certificate Course Glazig Workshop

Last week I realised I needed to get organised for my April Certificate Course Workshop on Glazig Embroidery. The notice, with information about student requirements, needs to go into the Guild's March newsletter. 

While I have books, a finished bag, a project in progress, along with a PowerPoint  already prepared from WES Group last year, I needed to prepare student notes, plan a student project and make sure the resources are accessible. This wasn’t a straightforward task, given the specific and contemporary nature of the topic. 

I can’t invent a design of my own, and I can’t breach copyright, so am working in narrow parameters. 

I settled on two small motifs available in the book 25 Years of Glazig Embroidery. Use for study purposes should be OK. Motifs are small, simple and have stitch charts. I have 5 books of official designs and students can use any of them. 

I cut squares of linen, discovered my iron-on transfer pen was defunct,  so decided I could use (some very old) dressmaker's carbon to transfer the designs to the squares. This enabled me, in between a  hairdressing appointment,  shopping  for  family dinner and weekend house guests,  to write the notes and newsletter notice. I emailed the notice to the Guild and the notes to Officeworks for printing.

After transferring about 5 motifs to linen using the carbon, I found time for a trip  to Spotlight  between picking up the printing and taking a granddaughter to JEMS on Saturday, to buy a new transfer pen.  It is medium thickness, and worked well.

The Au ver a Soie Perlee thread used in Glazig embroidery is so hard to get in Adelaide it is unreasonable to expect students to obtain it for the workshop. I have a supply I have acquired since diving down this rabbit hole, some of it from stock clearance sales. I figured I could cut some lengths of this to add to small kits.   

I used a punch to cut cardboard circles into which I punched 7 small holes, then cut lengths of 7 different coloured silk perlee threads and attached to the cards. If students need more thread they can cut a length in class from the remaining reels.

I now have 15 kits prepared, another 5 linens printed, 5 more sets of instructions and some spare cards, so I can quickly create additional kits if required, or support students who don't want kits. 

The notice has gone to the newsletter. I've amended the PowerPoint but will check it again before creating a USB closer to the workshop.

Phew! Panic averted!


Monday, February 19, 2024

Botanical Bee cushion

I bought this Bothy Threads needlepoint cushion kit from The Fox Collection with a view to making a birthday gift for a bee-keeping son-in-law. It is a long time since I did needlepoint, I loved the design, and I thought it would be relaxing fun to return to it. 

Unfortunately I got a bit bogged down in other projects, leaving myself only about a fortnight to work it. This, I soon discovered, was not quite enough!

I set myself up with the canvas on a scrolling lap frame, with a 60cm rod - the upper limit of the frame. It fitted on a long, narrow sofa cushion which I could place on my lap. The alternative was to use a slate frame and my Lowery floor stand, which limits portability.  With the lap frame I could work the left hand side of the canvas with my left hand below, right above and vice-versa for the right hand side. Awkward, but workable.

I think the only printed canvas I have worked before are Christmas ornaments. Mostly I have worked from counted charts. While the printing was excellent I had difficulty distinguishing some of the shading. Fortunately the full charts were included and I did a lot of referring. The area marked here, is, for example a pale blue/grey flower with a yellow centre.
I made reasonable progress on the flowers, but struggled a little on the body of the bee. In the end I used the general colouring of the body sections and free wheeled with the range of threads indicated.

As per the instructions, I finished the figures then filled in the white background. 

That's when reality set in. The cream section here took about 10 hours of stitching - very slow work! The edges, in particular, were difficult in the lap frame, because they were loose. I had a Friday afternoon stitching session and a Saturday evening at a daughter's place coming up so persevered.
On Saturday night, I changed over to a fixed roller frame and my Lowery stand. It still took me 8 more days to finish, but it was a lot faster, and more controlled, than the lap frame. 
           
I increased the size of the panel from 14" square to 16" by extending the cream background and adding a black border. I had ordered two cushion backs from The Fox Collection, one white and one black. The white was too white against the cream background wool, and the black more practical. I initially worked the extra incrementally to test if I would have enough wool, but it was soon evident I'd have plenty. I commend Bothy Threads. As well as a lovely design, they were generous with their supply of wool. Only two colours ran out - and they were sufficient. I obviously needed more black for the border, but  my stash of tapestry wool from long-ago projects contained 6 skeins of black - more than enough.
I finished it late on Sunday night, but couldn't resist attaching the back, inserting the filling and taking a photo before I went to bed. I really like it.


I had also bought some appropriate fabric to make a gift bag for the cushion, in lieu of wrapping paper. I didn't realise when I bought it online that it was flannelette!

I used it nevertheless. It is at least soft to touch.

I'm a little sorry to have finished this one. Although on a tight timeline, It's been a really fun project to work on.  

I am currently shelving the suggestion that two matching cushions would be a good thing.

Tuesday, January 30, 2024

Mexican Embroidery sampler


I have been working a sampler of Mexican embroidery motifs and stitches for my presentation to the World Embroidery Study Group in February. I began with a free sampler design from the Victoria and Albert Museum, presented as a small bag. 

While the designs are good, I found the instructions less so. They suggested copying the design on to fabric. Since a number of motifs were cross-stitch, and we know much Mexican cross-stitch is counted, this didn't make much sense to me. While the downloadable pdf has grid marks, the hand-drawn cross-stitches don't conform to the grid.

I decided to choose some of the motifs and work them on even weave linen. To save my eyes I used 25 count. It took a bit of translation and adjustment, but I finished with three motifs and a border more or less in line with those on the V&A sampler.
 
I started with the border, then added the deer, and fitted the others around this.
Before working the lower border, I decided to work the back of the bag with an Otomi design, taken from a book of such. 

Otomi embroidery is distinctive, produced by artists in Tenango de Doria, Hildago, North East of Mexico City. It features bright colours, animals, birds and flowers, worked mainly in a one-sided satin stitch. It is a flourishing business.  

Otomi artists hand draw designs on to fabric for the embroiderers to work.   

I also purchased a blouse from ArteOtomi, one of the Tenango cottage industries. It is extraordinarily beautiful.  This is the main front section. As you can see, figures are designed and worked in narrow sections. 

The back of the embroidery is amazing, and the garment could probably be worn inside out!
I have ordered more!

My effort does not compare. To begin with, the style was not designed for even weave linen, especially not a loose even weave.  While I could never have reproduced the fine product of the Otomi, the linen was very limiting, and would not have been used by an Otomi artisan (or an embroiderer with any sense!).

I drew a design on by tracing roughly from the book and using 4 strands of stranded cotton in colours roughly matching the book. I had to work with the quite large holes in the linen.
It took a couple of days, is crude, but does give the idea.

As a sample it provides a bit to talk about. I would probably have done better to work on cotton and appliqué it on, but it serves a purpose.        

The back of mine could definitely NOT be used - but it does show the technique.  


While I had worked the top border line by line, I worked the lower border by following the colour lines through. This is a more thread-efficient way to work, but has a greater chance of a counting error. I also ran out of three colours - I had forgotten how thread-hungry cross stitch can be when worked in dense geometric patterns. 
Fortunately, two of the colours were in a bundle of surplus threads a friend had given me, and I substituted for the third.  

As my mother would have said, it will pass with a push. 

I thought a fabric I recently bought from Batik Fabrics Online would go nicely as lining and yesterday I made the bag, using a narrow strip of the lining as a strap to carry it.

It will make a half-decent project bag. and will be of interest to the World Embroidery Study Group

It has certainly given me the beginnings of an understanding of the culture and diversity of Mexico,  and great respect for the  work of Mexican embroiderers, especially the Otomi.